top of page


WooCommerce Connector Setup Guide
Step 1: Start by logging into the organization that you would like to utilize the Woocommerce Connector App on.
Step 2: In the top right of your screen select the search button.

Step 3: In the search bar of the window that pops up, type Assisted Setup and the list of search options will automatically appear.
Step 4: Select the first assisted setup option.

Step 5: In the middle of the assisted setup list you’ll select the option Set up Woocommerce Connector.

Step 6: The next window that appears is the beginning of the Woocommerce Connector App setup and installation process. Follow the prompts of the process. Please refer to the steps below if you need any clarification.

Step 7: To specify the store URL first login to your WordPress account. In the top left of your WordPress dashboard, hover over your site name, when the drop down appears select visit site.

Step 8: Once your home page has come up, copy the URL and paste it into the assisted setup window.


Step 9: Your wizard should look like the following with your URL in place of this sample.

Step 10: Next you’ll need to get your store specific keys.
Step 11: To find your store specific key you’ll start in your WordPress Dashboard.
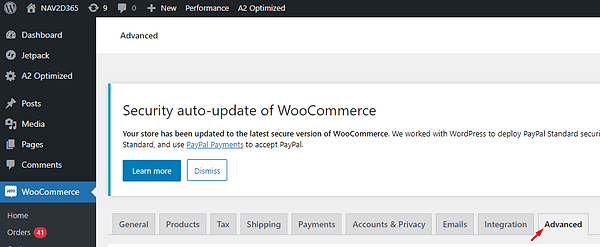
Step 12: Select the WooCommerce tab on the left hand side of the screen and then select Settings from the menu options.

Step 13: On the settings page you’ll find tabs across the top center of the page. Select the last tab labelled Advanced.
Step 14: After that select REST API on the left part of the screen.
Step 15: Then select Add key which can be found just below REST API button.

Step 16: In the Description field type Business Central API Key. Make sure the user is your name, and make sure that the drop down options under permissions is marked as Read/Write. Select Generate API key.

Step 17: You will now have two keys on your screen. The Consumer Key and the Consumer Secret. Copy each and paste the Consumer Key and the Consumer Secret into the designated place in the Woocommerce Connector App setup window.

Step 18: Once you’ve got your Consumer Key and Consumer Secret entered, click Next.
Step 19: After that we do a test connection to your web store.
Step 20: To go to second step connection to your web store must work.
Step 21: Here you can select the available synchronization options
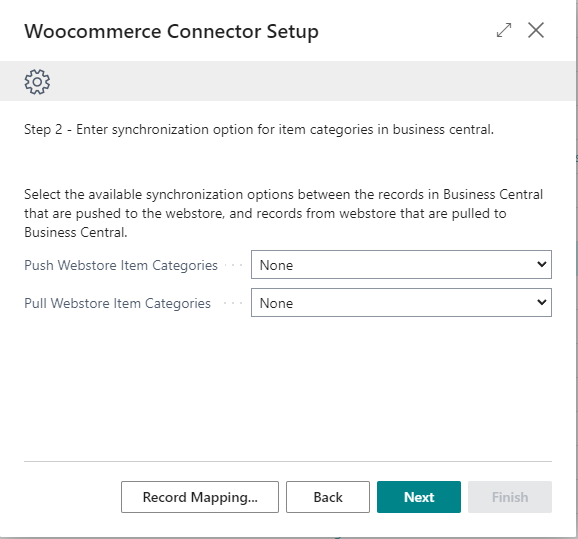
Step 22: Use Record Mapping to open Webstore Item Category Mapping where you can map your Item categories.


Step 23: After that click Next.
Step 24: On this step you can set the default template to use when creating items, enter item location and attributes that are used as product dimensions and select the available synchronization options.
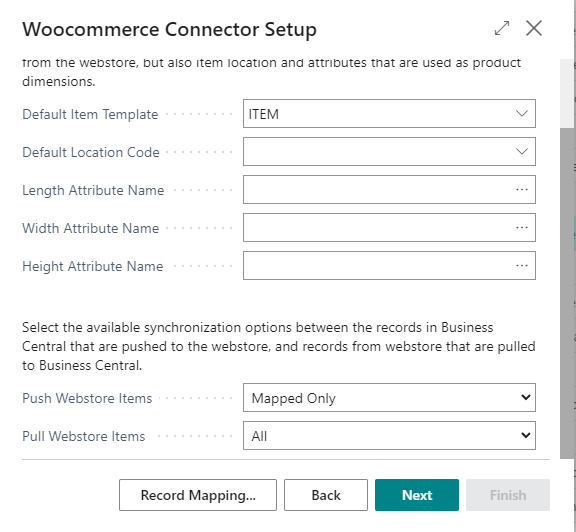
Step 25: Record Mapping will bring you to Webstore Item Mapping Page.

Step 26: After that click Next.
Step 27: On this step you can set default posting groups that will be used for customers that are imported from online store and also Set the default template to use when creating customers that are synchronized from the webstore.

Step 28: Here Record Mapping will open Webstore Customer Mapping Page.

Step 29: After work is done, you can continue to next step.
Step 30: Here you can select the date that you'd like the WooCommerce Connector to sync orders and select the available synchronization options between the records from the webstore that are pulled to Business Central.
Step 31: You can also select the G/L Account number (Sales Tax Account No. field) to which to post the total VAT amount from webstore sales orders and G/L Account number (Shipping Account No. field) to which to post the total Shipping amount from the webstore sales orders.

Step 32: On this final step you can choose Enable which will run periodic background jobs to keep the data up-to-date in both locations.
Step 33: After all work is done, click Finish to save setup and exit.

bottom of page